In this i will be showing you how i Created a Running Water effect In Photoshop CS6
Create a new document, i did mine 10cm by 10 cm, with 300 resolution.
Once you've pressed OK and created your new document, create a new layer by clicking onto the icon next to the trash can at the bottom, and have the new layer selected.
Go to the colour panel and get a grey colour then press ok.
Click Edit, then Fill, and then press okay and it should make your new layer the grey colour you just chose.
Then to add a Fibers go to Filter, Render then Fibers and a small screen should appear.
This is the screen that should appear, one this change the Variance to 20, and the strength to 5, your pattern may be slightly different but should still work fine.
Then once you've clicked OK, we need to add a blur on to it, go to Filter, Blur, and then down to Gaussian Blur, and a small screen should open up again.
On the just change the Radius to 6 pixels, and it should go more blurry, if you have the Preview button ticked. Once you've done that press Ok.
Then were going to add another blur, but this times its going to be a Motion Blur, its in the same place as the Gaussian Blur, so Filter, Blur, then Motion Blur, and again, a small menu you should appear.
 For this, Change it to 90 degree angle, and 100 pixels in distance then press OK.
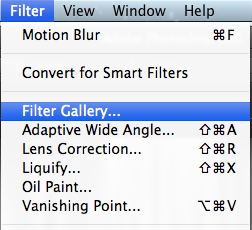
Now were going to add a Plastic Wrap effect, on some photoshops, its in Filter, Artistic, then Plastic Wrap, but on mine (cs6) its Filter, Filter Gallery then a menu appears.
When that menu appears Click on Artistic, usually the top one, and look for Plastic Wrap, Change
the Highlight Strength to 15
the Detail to 10
and the Smoothness to 10
once you've done that press OK
After the steps so far, mines now looking like this, hopefully anyone following this, yours will look the same.
Open up Filter Gallery again, Filter, Filter Gallery.
Once open go to Sketch, and Chrome, put the Detail to 0 and the smoothness to 8 then press OK.
Once thats been done i went to Edit, Transform, and Warp a Grid then appeared over my layer, I made it really narrow and just messed around with it loads, put a few twists in it until i got something i was happy with.
Thats what i was left with after a few minutes of warping it, which still doesn't look much like water.
Create a new layer then go to the Gradient tool and create one.
Create a Gradient with Dark blue and the start and finish, and a lighter shade in the middle, Hold shift and drag it across the centre of the image to get a decent gradient of blue and then once thats done click back on to the layer with the "water" on it.
Move the "water" above the gradient layer.
And Change it from Normal to Hard Light.
If the "water" is too faint and can't really make it out just select the layer, and go to Layer, Duplicate Layer, and it should work more effect.
Finished Water effect.


No comments:
Post a Comment